Below is an American Character doll. She is in her original clothes. I have a few dolls that need clothes, so I decided to recreate the look of this dress. The patterns are available for 14-14.5 in. and 16 in. dolls.
Click on the Click Here for Free Patterns” on the home page for the free patterns. (All seams are 1/8 in except waist seam and where the back of the dress is sewn is ¼ in.)

Lay out the pattern pieces on the fabric and cut out.

I always put Fray Check on the edges of all my fabric pieces. Use whatever brand you prefer.
Sew the darts on the back and front bodice pieces.

Sew the shoulder seems together and press the seams flat.

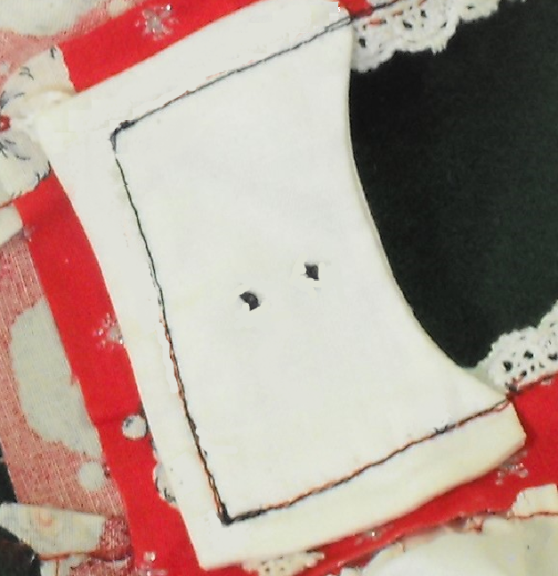
Sew the facing to the bodice and clip the seams. The clipped cloth doesn’t show up well on the picture, so I used lines to illustrate clipping the seam. You need to clip the seam all the way around the facing.

Fold over facing and press flat. It makes it so much easier to work with and gives a better finished look.

Sew on the lace in strips. One piece across the bottom and a piece up each side of the bodice as shown. You can sew them to the facing or through the bodice, whichever works best for you.

Take the two pieces of yoke and sew them together leaving an inch at the the bottom. (The inch at the bottom allows it to be turned right side out.)
Next, clip the rounded edges. (The marks I made on the fabric didn’t show up in the picture, so I put them in with a picture editor.)

Turn the yoke right side out and press. Hand or machine sew closed the opening at the bottom.

Sew the yoke onto the dress either by hand or with a machine. (Be sure to fit the yoke to the bodice by placing the bodice and yoke on the doll you intend to wear the dress. You won’t be happy with how the yoke fits if you don’t.)

Sew the velvet ribbon on the front either by hand or with a machine. Add buttons for a more finished look.

This is how the back will look.
Fold the bottom of the sleeve over 1/8 in. and then fold the sleeve over again ¾ in. Pin the folds in place and to make it easier to work with press folds I place.

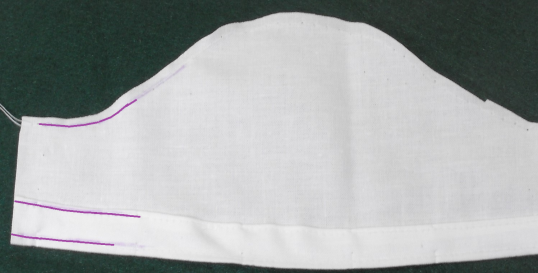
It was a little hard to see from the original picture, so I drew lines to show the direction the stitching should go. On the top of the sleeves, put a gathering stitch 1/8 in. below the top edge. (If you sewing the sleeve on a machine, then use the largest stitch the machine will produce for the gathering row of stitches.) This row of stitches should start about ¼ inch in from the edge on the sides. This provides a flat edge to sew the sleeve together later. (See the top purple line to illustrate.)
Also, sew the top of the folded material as close to the top as you can. The purpose is to catch the 1/8 in. fold in the seam. (If you are sewing by hand, a hem stitch works great.) At the bottom of the sleeves, sew another seam at least 1/8 inch above the fold. You have created a tube for the elastic to go through. It creates a ruffle on the sleeve.
Pin and sew the sleeves into the bodice arm holes. Make sure the edge of the sleeve is even with the side of the bodice.

To get the right length of elastic for the sleeves, wrap a piece of elastic around your dolls arm pulling the elastic only slightly. Cut the piece of elastic and then cut a second one the same size for the other arm. These gather the sleeve around the arms.
Put small safety pin in the end of the elastic to guide the elastic through the tube you made.

Feed the elastic though the tube you created at the bottom of the sleeve. As soon as the tail end reaches the edge of the sleeve, put several stitches in to hold the elastic in place. Then, continue to feed the elastic through the tube. Once the elastic reaches the opposite edge, put a few stitches in to hold the elastic in place. Remove the safety pin. Do the same with the other sleeve.

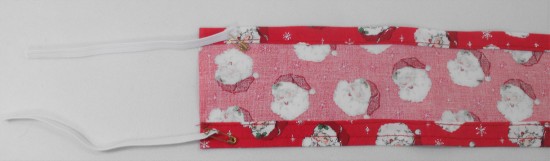
I should look something like this.

Fold the bodice and sew the side seams.
Clip the seams at the join between the sleeves and the bodice using a 1/8 in seam. This is the underarm of the bodice and if you don’t clip the area, the sleeves won’t sit correctly.

For the best dress length, hold skirt up to the doll you are making the dress for and put a pin in for the length you want. The pin should be where you want to fold the hem. Fold the bottom of the skirt where you put the pin and turn the top of the folded fabric in. Press the hem for a better look before you sew it.
Sew a gathering stitch across the top about 1/8 in. down from the top. (If you are using a machine, put it on the largest stitch the machine will make. This makes the material easier to gather.)
You can hem the skirt at this stage or wait until the dress is complete. If you hem it at this stage leave an inch on both ends un-hemmed. The purpose of this is to allow you to sew the back together and have the hem smooth all the way around.

Gather the skirt to the length of the bottom of the bodice. Pin the skirt to the bodice and sew a ¼ inch seam.

This is what the dress should look like at this stage.

Sew the back of the dress together with a ¼ inch seam. Leave a 4 ½ inch opening from the neck to below the waste.
Use the fasteners you like best. I prefer snaps.

Now you are ready to make the matching bloomers.
For the waist of the bloomers, turn the edge under 1/8 inch and then fold it over again ½ inch. Sew a seam as close to the edge of the second fold as you can. (If you are sewing this by hand, a hem stitch will work well.)
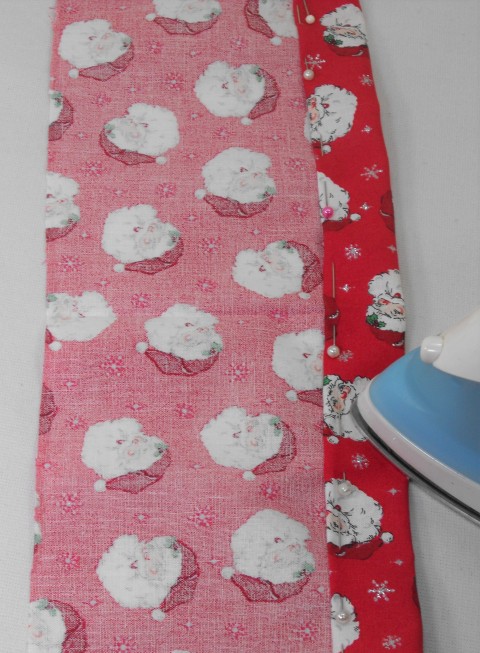
For the bottom (or leg side), fold the fabric over 1/8 inch and then again ½ inch. (This is pictured on the left side of the photograph.)
Next, sew a seam as close as possible to the inner fold. (This is pictured on the right side.) (The purpose of sewing close to the edge is to catch the 1/8 in. fold in the seam.) Then, sew a seam about ¼ inch from the outside fold. This will put a slight ruffle on the pants leg. (Make sure the tubes you form will fit the elastic and safety you are planning to use.)

Run elastic through both the tubes as explained for the sleeve. Then, sew the two ends of the bloomers together with a ¼ in seam.

Turn the bloomers right side out. At this point you have a circle of fabric. Make sure the fabric is evenly distributed around the elastic pieces.
Place the seam in the middle. Finally, sew a row of stitches about ½ in long to join the front and back of the bloomers. This creates leg holes for the doll.

Those are the sweetest and cutest dresses ever!! The dolls are precious.
LikeLike